Audi S3 - 2002 - instructions for changing brake discs and pads

agedog

Registered User
Joined
May 24, 2011
Messages
9
Reaction score
0
Points
1
Location
NULL
Hi All.
Im not much of a mechanic, however am considering changing the discs and pads on my 02 S3 myself.
Could anyone advise where I could find a step by step (with pics) preferably instructions to carry this out and an idea of the tools required to complete? It this an resonably easy job? Or would you suggest paying a mechanic to do this?

Also just bought a pipercross induction kit, I assume this is reletively easy to fit? Does anyone have an experience with these Piper cross kits? Are effective etc?

Thanks all.
 
From the TT forum

Chip_iTT said:
A selection of photo's to show how easy it is (as long as you can get the f****** wheels off)...

First make sure you have everything you need: pads, discs, brakedust spray, caliper paint and a 1/2" brush, copper grease, a stiff brush, lots of kitchen towel, an 18mm socket, a 7mm allen key, crosshead screwdriver, flat blade screwdriver, big hammer and several chunks of wood, brake bleed tube, bottle and bleed spanner, and some latex gloves are useful

whatyouneed.JPG


Now get the wheels off the ground.... note the use of a bit of 4 x 2 to make the ramp more gentle to avoid fouling the spoiler... this gets the car high enough to get the jack and stands under... and don't forget to chock the rears

lifting1.JPG

lifting2.JPG

ChocktheRear.JPG

lifting3.JPG


Next remove the wheels and spray liberally with brakedust remover spray (several times and wipe off between... the stiff brush is useful too)

wheeloff.JPG


Remove the spring, noting how it is seated

RemoveSpring.JPG


remove the guidecaps and then the guides with the 7mm allen key

removeguidecaps.JPG

RemoveGuides.JPG


lift the caliper away, removing the old pad, and tie it out of the way to the suspension. Be careful not to twist or kink the brake cable (on the LH side you'll need to unplug the brake wear sense cable)

removecalipers.JPG


Now is a good time to push the piston back so you'll have room to put the new pads on (sorry no pic of this). To push the piston back, put the brake bleed tube on the bleed nipple and undo 1 turn then with a chunk of wood press the piston back in as far as you can (about 1/4" showing) and then lock off the bleed nipple.. do this BEFORE you paint the caliper as brake fluid and fresh paint don't get on too well...

Now remove the carrier using the 18mm socket

removecarrier.JPG


Here is a comparison of old and new pads.... these pads were on their last legs

NewandOld.JPG

NewandOld2.JPG

BadDisc.JPG

NewandOld3.JPG


Now remove the disc...undo the screw, which needs lots of WD40, and possibly an impact driver (tip: try doing the screw up first while tapping the end of the screwdriver with the hammer...)

removedisc.JPG


Replacement is the reverse of the above...

Some other tips:

You will probably need 3 coats of paint on the calipers and carriers... and then touch it up after its back on the car. Don't paint the bits where the 'ears' of the pads locate or you'll only have problems fitting them later.

The retaining spring is a ****** to get back on without scratching the paint... with the new pads in its much tighter than with the worn ones... a pair of pliers helps to pull it into position...locate the ends in the holes first then manipulate it...you're less likely to scratch the paint this way (but it'll need a touch up after anyway)

If the wheels and/or discs are 'stuck' try bashing them from behind with a hammer through a lump of wood.... don't use the hammer direct (unless its a rubber headed mallet)

Before fitting the pads, copper grease the back of the pads and the edges of the runners, also clean the guide pins with a light emery rub and grease them too. Copper grease on the back of your alloy wheel where it mates with the disc and on the wheel bolts makes it easier next time...

Whan all is done, stand back and admire...

result.jpg
 
That guide seems a bit a long winded way to do it. No need to separate the caliper from the carrier or remove the clip.
 
That guide seems a bit a long winded way to do it. No need to separate the caliper from the carrier or remove the clip.

Well,do a better one then :thumbsup:
 
  • Like
Reactions: rhubarb4
I removed my pads and re-fitted them recently without removing the clip and carrier. Just requires removing the two main 17/18mm bolts to remove the complete caliper and then prying the pads towards each other and they just slot out.

Obviously my clip is either broken or something else :think:
 
Last edited by a moderator:
I removed my pads and re-fitted them recently without removing the clip and carrier. Just requires removing the two main 17/18mm bolts to remove the complete caliper and then prying the pads towards each other and they just slot out.

Obviously my clip is either broken or something else :think:

I guess it's possible to do it this way, but you would need 2 pair of hands, how else would you have supported the weight of the caliper and carrier whilst extracting your old brake pads off? Please tell me you didn't rely on the brake hose to support the weight, that's the work of a cowboy.

You want to remove the caliper seperately, so you can clean, inspect and regrease the slider pins,
and also clean the part where the brake pads slide along the carrier, then put some copper grease on it, which would be more difficult with them still both attached.
 
I removed my pads and re-fitted them recently without removing the clip and carrier. Just requires removing the two main 17/18mm bolts to remove the complete caliper and then prying the pads towards each other and they just slot out.

stop being lazy and do it properly!
do you work at kwik fit??
the pad guides need cleaning of dust and a quick dance over with a file to remove corrosion then a light smear of copper slip... to ensure the new pads dont seize in the runners and they will wear evenly.
 
Removing the clip and then the caliper is the correct way to change the pads...

<tuffty/>
 
where do you get caliper paint from , and what is a good heat resisting make, i'm looking for Yellow
 
where do you get caliper paint from , and what is a good heat resisting make, i'm looking for Yellow
Talk about a thread bump!

Have you tried looking at a website belonging to Halfords?
 
any paint will do for the calipers, just make sure everything is clean and you prime them first. I did mine 5 or 6 years ago in a graphite colour and its never spoilt, think it was pug graphite grey lol just picked from halfrauds 3 for 2 offer wanted a subtle dark colour.
 
Help! lol.
iv got as far as taking the disc off but theres a wheel spacer hiding the screw.
cant get it to budge!
any idea how i can free it up...
Paul
 
yesss! hammer time!!

ok iv got it off....

might have a problem though... the screw wasnt actually holding the rotor on.
its sheared off!

im not able to tap n die myself. is the screw vital?
 
:thumbsup:
Cheers Westy
cheers Reesy
id better crack on. i took the wheel off at 8am.
:uhm:
 
Sorry fella but if you need instructions on how to change disc and pads then you shouldnt be doing it, dodgy brakes cost lives.

My advice would be find someone who knows what they are doing and lend a hand, best way to learn, not by spanners in one hand manual in the other !!
 
its ok mate. dont worry.
iv done the watching bit enough times. its a piece of ****. i just needed guidance rather than me cause damage.
its only takin so long because im having to strip a stupid amount of paint off them.
looks like prev owner diddnt fancey strippin em. he just painted over somebody elses job.
 
Nice !!
Just what you want that is, see where ya coming from now, piece a **** once ya done it once.
All i would say is watch ya hoses, both my front and rear (offside & nearside), the pipes split at the caliper where it goes into the metal connector, one of em came off simple but the other took hours as it tried to snap the under body brake pipe, not fun!!
 
Ouch! 2 hrs doesnt sound like fun.
Cheers, i'll keep an eye on them.
:arco:
 
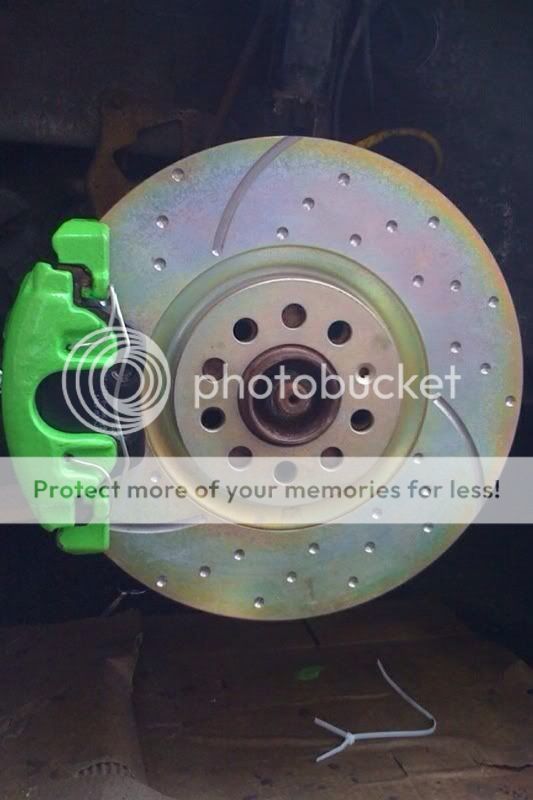
Heres one side nearly done :D (if theres no picture below. im blaming this computor)
molineux84

I'll might do the rest when my clothes have dryed. its ****** tipping it down lol.
 
Cheers! They're EBC 3GD Front Sport Rotors
Fleebay jobie :)
With EBC ultimax pads.
Most cost efective decent upgrade i found
 

Similar threads

Replies
11
Views
951
Replies
4
Views
885
Replies
16
Views
1K
Replies
7
Views
1K
Replies
10
Views
1K