MUSH Developments` S3

Another small update, busy again so nothing massive but ive now got the jetex filter i ordered. Offered it up to see how itll fit. Ill jump on making a heatshield eventually but for now at least it fits/looks good

4cc55b3e.jpg


Also fitted the new EGT sensor, the connector for this is at the rear of the bay behind the catch tank, thats where i wired it to when i made the loom, no point in having it at the front of the bay. All Plumbed in...

7f313d10.jpg


And got a few more pipes painted along with the inlet. Ill fit this manifold to get it running as i havnt had the time to even think about the RMR one i have.

177ac153.jpg


Next task is a good one, ill be fitting the pipes/manifold and the final fit of the front panel which means coolant can be filled up and were nearly at the startup!!

:)
 
Looking good there Nick. When's it on the road then lol

Cheers mate, Not too long really. Sick of making excuses but its not my priority at the minute. Im busy living in a building site so thats the biggest priority. However ive made some good progress so it should start to get interesting...

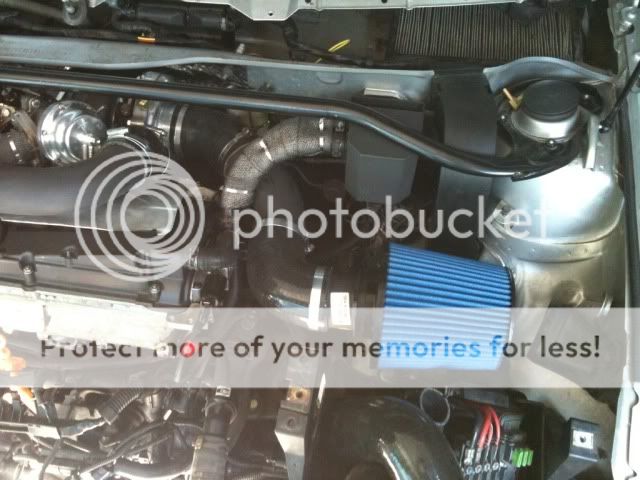
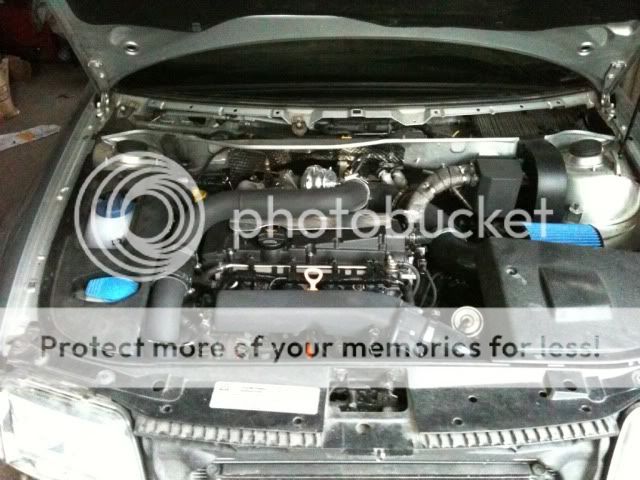
Started by fitting up the charge pipe that i sprayed up...

ce4fd73c.jpg


Really impressed by how this pipe turned out as its 4 angled pipes welded up and it fits perfect!

And then fitted up the inlet manifold. As befroe this is purely temporary as ill get the RMR made up soon.

36af2654.jpg


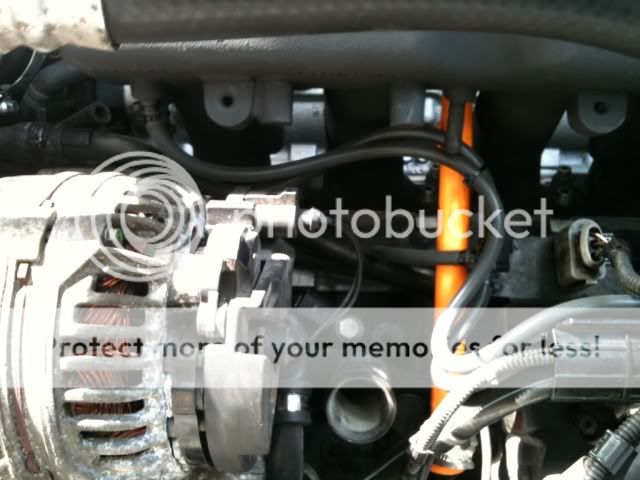
Got all the vacuum feeds connected up, theres only two, one which feeds the DV directly, and then one which feeds the FPR which is also T-d off for the boost gauge also...

62f72e0b.jpg


You may notice my dipstick tube comes up in the wrong location, however this was the position it came form the machine shop. Ive measured it and its spot on, but its straight up which puts the dipstick location slightly off. Doesnt bother me as itll sit ok in the runners of the new manifold.

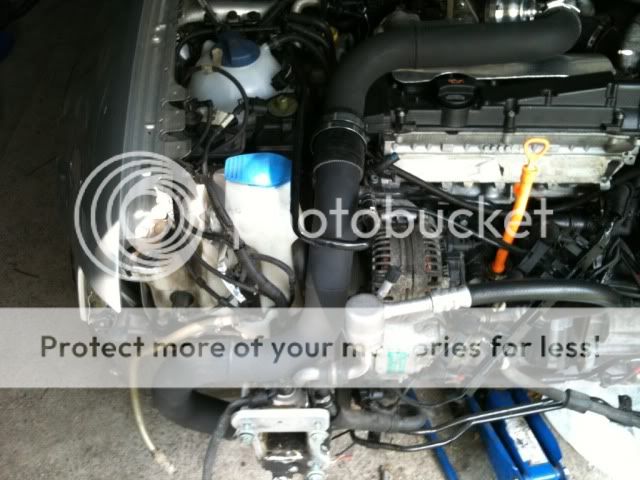
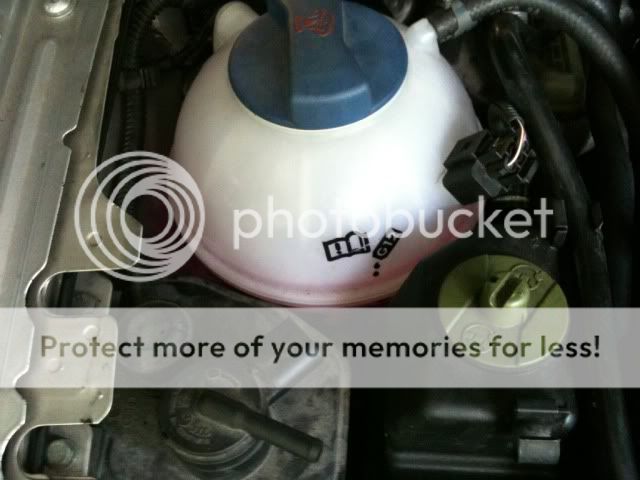
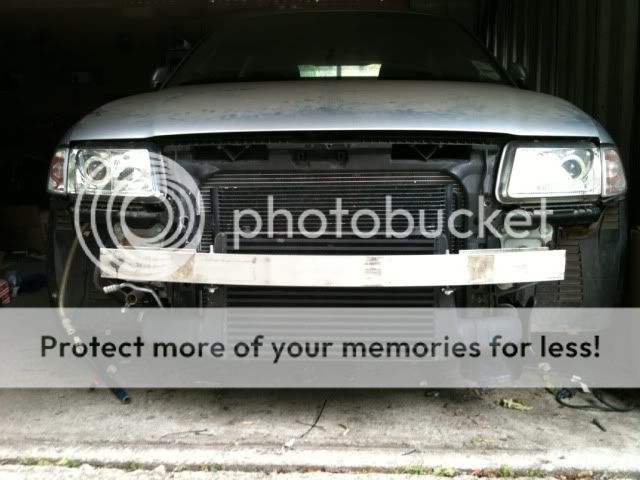
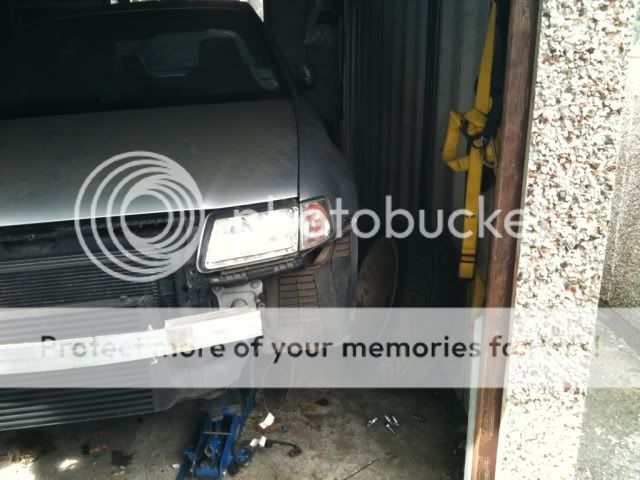
Anyhoo, as that was all fitted i chucked the front slam panel on for the final fitment.Felt good to do this eventually. 5 mins of fitting coolant lines meant i could fill it up!! 50/50 mix

30152333.jpg


Itll still need bled and circulated but theres no leaks..........for now. lol

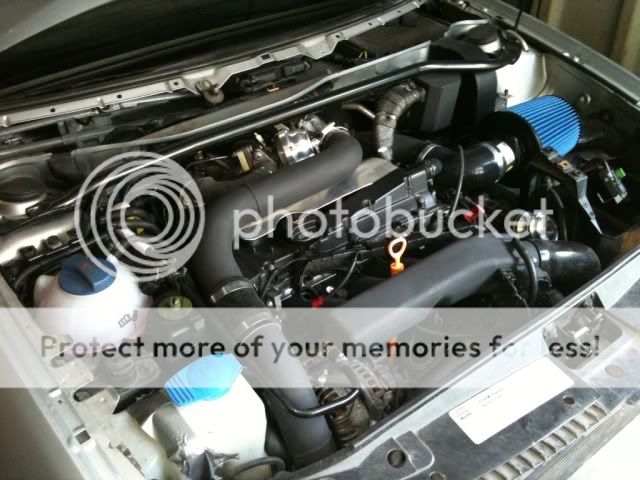
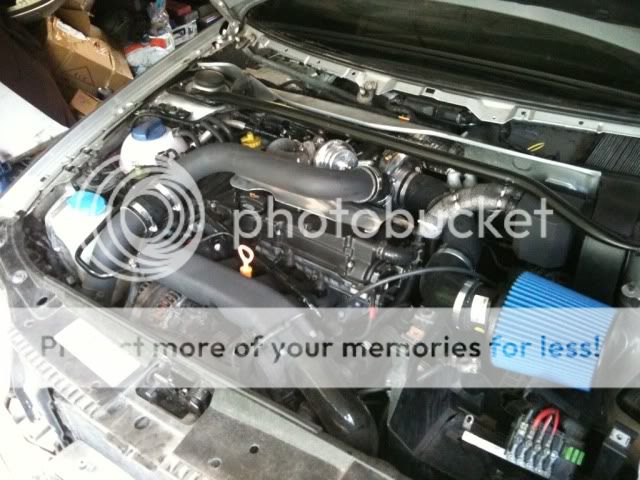
So the bay is looking good....

639a18a9.jpg


1bca7188.jpg


And for the few people that have been asking about my fmic, heres a few pics. Im confident itll work well, but in the fututre if the AH coolers prove to be good i may well invest in one of them. We`ll see. It all depends how this works out to be fair. Cant complain, hasnt cost me a great deal so far and it fits champion.

Anyways, heres a few...

066d8dec.jpg


d4728156.jpg


Drivers side fitted up. Ive left the silicone slightly longer here incase i do change in the future.

69f70d96.jpg


The aircon pipe you can see here is actually knakered but ill be getting that repaired very soon.

Passenger side...

e0ad81e0.jpg


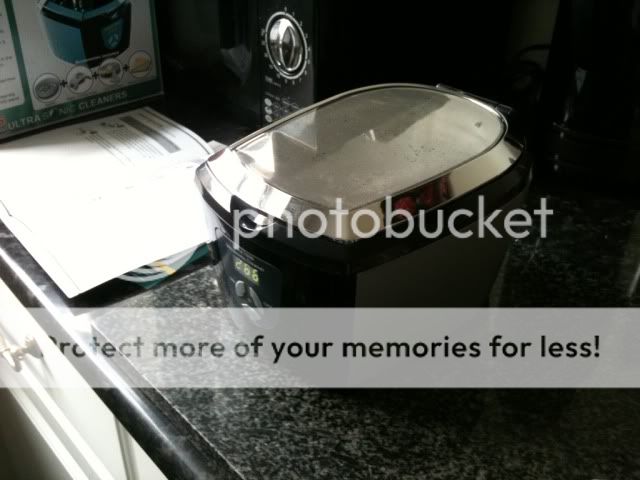
Decided to then ultrasonically clean my injectors, what a great piece of kit this is. Did it twice just to be sure, the first time there was loads of crap left in the bowl afterwards...

fa061de8.jpg


And then fitted up....

0dc8da0f.jpg


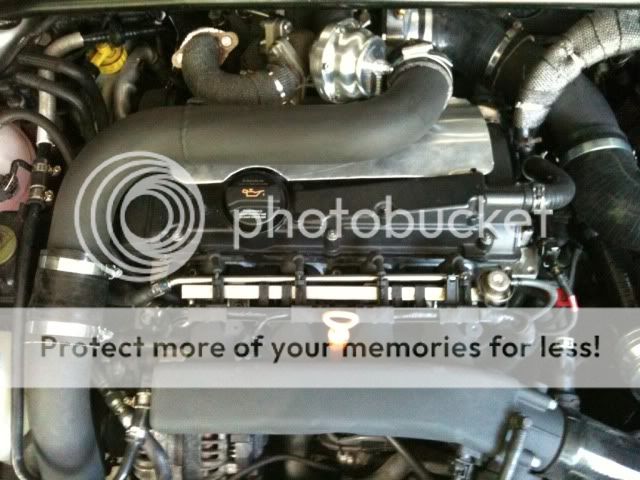
Just got my standard S3 injectors in for now. With the idea that the ECU will run in closed loop wideband lambda and trim off any excess fuel. If the trims are excessive ill do it with unisettings.

And fuel rail fitted...

4d90137c.jpg


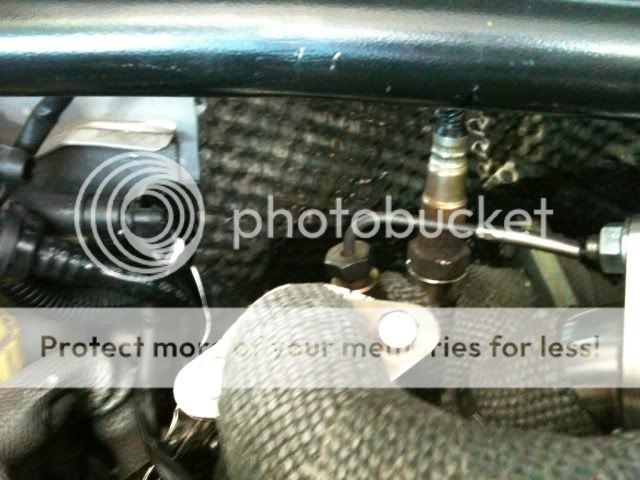
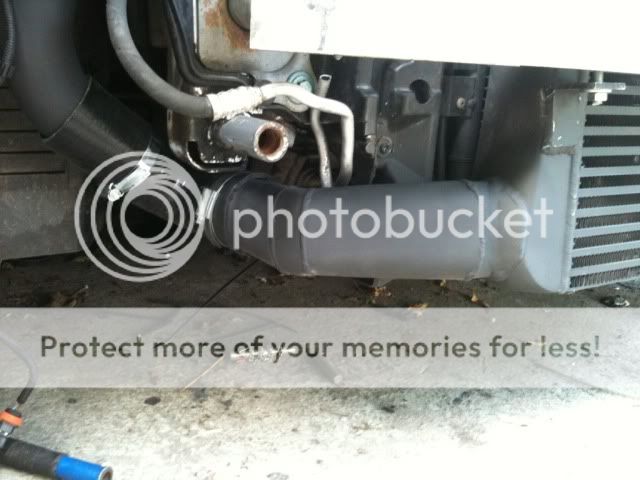
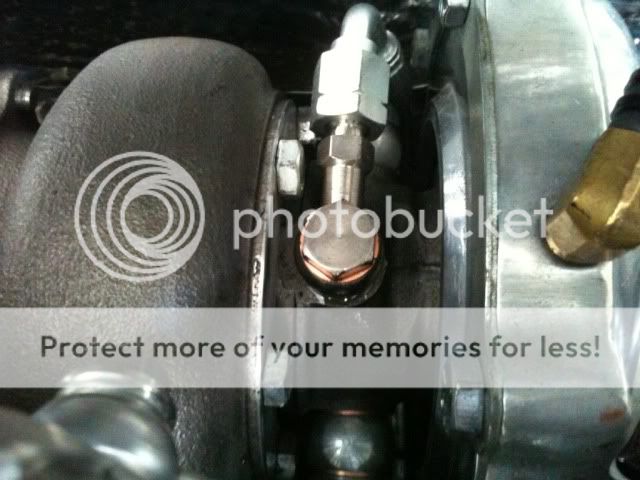
Heres a quick pic to show the turbo coolant line which then connects to the after run water pump...

8b6d5b20.jpg


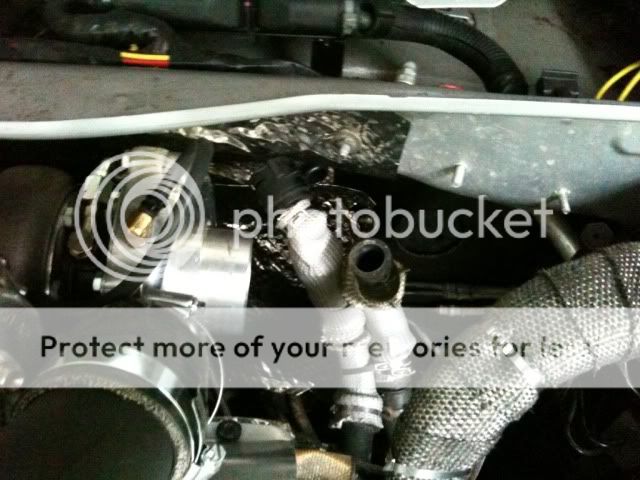
I then worked on getting the passenger side connected up, took loads of trimming of the silicone to get it right buts its there now...

da56b66f.jpg


So the bay is complete, and looking good. Ready to power it up now!

bd22a14a.jpg


Still not totally happy with the room on the rhs of the bay, the battery box takes up loads of room. I may downsize this or relocate it to the boot which would free it up lovely. We`ll see about that.

I gave my battery to my pal for his mk4 when his died in the winter so as soon as i get a new one some time this week, ill be powering it, fuelling it up and checking for faults before priming the system and firing it up!!

Cant wait...!!

Thought welcome.... ;)
 
Good luck Mush, hope it fires up ok for you! I forgot to earth the gearbox on my very first attempt and it did nothing- I then thought oh sh*t but then put 2 and 2 together and realized the starter wasn't even turning and that I had forgotten to earth the box!

I noticed your coolant is up to the level just underneath the drips-is that the indicator for the max level on the reservoir?

Cheers Andy. At least it was a simple mistake! Ive defo got the earths sorted, a bad earth on my 8v mk2 killed the ecu which flooded the engine and wrecked the big ends! So i think i learnt my lesson, lol. Ill be connecting up vagcom to ensure the rest of my wiring is also correct. Sure therell be a niggle somewhere, but there always is after builds like this.

The correct coolant level is slightly lower, this is just where mine is sitting at the minute. As soon as i turn it over a bit and get the pump working ill have to top it up so im expecting that already.

Fingers crossed though eh?
 
Last edited:
So, got 5 mins spare today so i jumped on getting the car started up. Been dying to do this for ages and this is just as important as the mapping session so had a bit of nerves...lol

Now, i have a severe lack of battery as i was good enough to give me pal mine but he hasnt since reciprocated the love, so im still waiting for that as yet. So i got me work car parked up out side the garage, disconnected the battery and connected that battery up to the S3 via my jumpleads.

Before i started it up i needed to do a few little jobs. First i replaced the 1BAR wastegate spring(Large Blue) with a 0.7BAR (Large Yellow) spring. This is to help later on, but i wanted to get it in now so i dont have to unnecessarily take it to bits again.

ac779ae1.jpg


And then i got the EH&S up to scratch...

d66cb7a9.jpg


So i could then connect up the battery. Nice to see all the lights on the inside again, its been a while.

I chucked in £10 of petrol as i had previously drained the full tank it came with for my lasses car. And then before starting it up i removed the J271 ECU relay and span it up for a good minute to get the oil going round the system. Checked that oil pressure was good and as i left the turbo oil feed slightly loose i could see oil getting through the union...

205eff36.jpg


So i tightened that up and chucked the Relay back in ready to start up. I turned it over but it wouldnt fire. Had me some head scratching as everything looked ok on vagcom, no faults so had to check a few things over and found that the coils werent firing. My heart sank for a minute, right up until i discovered id been a tit and hadnt connected up the wotbox controller. Due to the nature of the controller it opens up the power line to the coils and without the controller connected it obviously didnt feed power to the coils. monumental DOH...!! lol

Anyhoo, got it connected up and went for it again. Fired on the start of the key WOOHOO!!

Fired up and idled up nice and easy, sounded a little tappy to start with as expected but after about 30 secs it sat mint with no horrible noises!!! Had the DIS going a bit doolally as the coolant wasnt totally up to the line so i had to top that up but it all went well. I videoed the first start but the video is about 2 mins long so i might upload that a bit later.

Had it running for a good few mins, got the temperature up to 90. Took another shorter vid that looks poo after compressing....


Although after a few minutes i started getting vapour rising from around the back of the engine. Some of this was to be expected form various painted bits curing but it got a bit worse, traced it to the RHS matrix connection, it was leaking coolant, not that you can see from this photo...

f5ad41a5.jpg


There was a steady stream of coolant coming out of it so i stopped there to let it all cool down. Ill look into that when i next go in the garage.

But there were no other niggles that i could see. Im sure they will surface if they are there though so lots more fun to be had!! Good thing is theres no signs of bad smoke coming from the exhaust, and the exhaust sounds ACE! So for now, i am a happy bunny....

;)
 
Cheers chaps, just need to look at this matrix connection, hopefully it just needs checking over, maybe i didnt get it all the way home when installing?

Either way the TIP has to come off to give access but to be fair as coolant leaks go hopefully this will be an easy one.
 
looks good mate keep up the good work

hope mine goes as well as yours :thumbsup:
 
Good and bad news...

Whipped the matrix connection off tonight...

50622a56.jpg


And ive fitted a connector without a rubber seal in it!!

af405c41.jpg


What a tit, didnt even think of checking. There wasnt even the retaining plastic lip inside, but at least its an easy fix so ill go get a new one on saturday and get it ran up again!!
 
Be a few month id imagine Dan, still got to finish putting it together, MOT, tax, setup suspension, get it ran in blah blah blah.

Im hoping to make a few shows in september in it, mapped or unmapped
 
....What a tit, didnt even think of checking. There wasnt even the retaining plastic lip inside, but at least its an easy fix so ill go get a new one on saturday and get it ran up again!!

All been there mate, occupational hazard on these type of builds... always the little things you seem to overlook while putting the car back together...

Glad she is (technically) up and running though... I was sh*t scared the first time I turned the key on mine the first time around... even though I have done a few head swaps since its always a relief when they start up although I have now come to expect the odd leak as it does happen :)

<tuffty/>
 
looking/sounding good mate..... wont be long before you up and running
 
All been there mate, occupational hazard on these type of builds... always the little things you seem to overlook while putting the car back together...

Glad she is (technically) up and running though... I was sh*t scared the first time I turned the key on mine the first time around... even though I have done a few head swaps since its always a relief when they start up although I have now come to expect the odd leak as it does happen :)

<tuffty/>

Aye i know bud, im just happy its an easy fix. Hopefully when it pressurises properly i wont find any more leaks!! Think ill be ok though. First start is always a bit hand in mouth, but now its done ive got a bit more confidence to crack on.

Same happened when i 20v'd my mk2, always a few niggles!! Lol
 
looking/sounding good mate..... wont be long before you up and running

Not to far off now matey!!

You sorted your bodywork out yet? Meant to have rang you for a while now, its best you understand im not the best at deadlines or timings lol think the army drove that out of me!!
 
Not to far off now matey!!

You sorted your bodywork out yet? Meant to have rang you for a while now, its best you understand im not the best at deadlines or timings lol think the army drove that out of me!!

Yes mate all bodywork sorted, went up for front end and side painted ended up getting everything but the tailgate painted!
All mot'd then had to get the spanners out but Will be on the road soon (hopefully next week)
running on base map at the moment until it gets mapped
 
Last edited:
Nice work Mush- glad it fired up ok! Always wise to have that fire extinguisher close by!
 
just a couple of little chips out of 2 blades on the comp wheel,the said it could be dressed up and rebalanced but i wasnt happy with that so new wheel was fitted...just one of them things
 
Suppose so mate, the power your pushing you want it to be right!!
 
Nice work Mush- glad it fired up ok! Always wise to have that fire extinguisher close by!

Yep chuffed with how it went bud cheers, just need to sort this coolant leak and ill be sorted!

Im a bit fire conscious, should be considering i work in the industry! Lol got a bigger one in the garage too, and a little one in the glovebox... Lol
 
Was really thinking i was starting to get somewhere when i decided to nip in to the garage and get a few jobs done, only little ones to be fair, was going to change the pollen filter, refit the plastic scuttle/wipers etc....

However, got in the car to find the nylon tube for my Stack boost gauge (ive lost it...lol) and found the brake pedal to be a little spongy when i got my foot on it. Was a little gutted, cant stand working on brakes and ive had many brake prolems in the past so i thought i hit it lucky when they bled through ok this time. The only parts of the brakes ive touched (bar bleeding) is the front callipers so i thought id check them out.

Bingo, found the nearside inside bleed nipple to be seeping a little, so car up again time...

5626318f.jpg


However even when mega tight, the nipple when under pressure from the pedal still seeped out. It was now that i noticed the fluid that had leaked had ******** the paint on the rear of the calliper and a few other spots. Really couldnt be bothered with stripping it off again so i whipped the nipple out for a quick inspection. Seemed ok but i had some spare so i tried one of them in.

In my little stash i had some stainless nipples i bought off ebay ages ago. They had a slightly different shaped sealing cone so i thought it was worth a try...

0197162d.jpg


The nipple on the LHS is the genuine Brembo nipple, and the RHS is the stainless ebay jobby. Anyhoo the RHS nipple when fitted, stopped the leaking, so i bled the line and pumped the brakes up again, no leaking.

I thought oh poo i might have to sort the calliper if the internal sealing face wasnt sound but luckily the cheap spare nipple saved the day. Woop woop!!

Got nothing else done though...
 
Great thread Mush...very detailed

day

Cheers mate, just detailing what im doing, whether it works.....or not :laugh:

Sounds like you had a fun filled day

Always matey, today i went and got the required matrix connector, so now thats fitted WITH the rubber seal in place. Also topped up the coolant and then set about stripping the STACK boost gauge...

88ec5649.jpg


And then tried painting the clear lens as S3kev did. It should work fine but if it doesnt ill clean it and try to get a red lens instead.

4a5477ee.jpg


Just letting it dry for now. Was going to start on mounting the horns and getting the oil cooler ready to mount but instead i helped me pal take delivery of his mint 80k mile VR6 lump for his mk2 golf.