- Joined
- Mar 28, 2010
- Messages
- 10,073
- Reaction score
- 2,697
- Points
- 113
- Location
- Liverpool/Southport. N west
greetings gents, had a busy day today on the car and thought id upload and share my story as i have nothing better to do, alone on a saturday evening as the girl friend is away.
so, i took my car off the road before christmas with the intentions of doing a few things, however with the weather so terrible i did very little, until the past week or so.
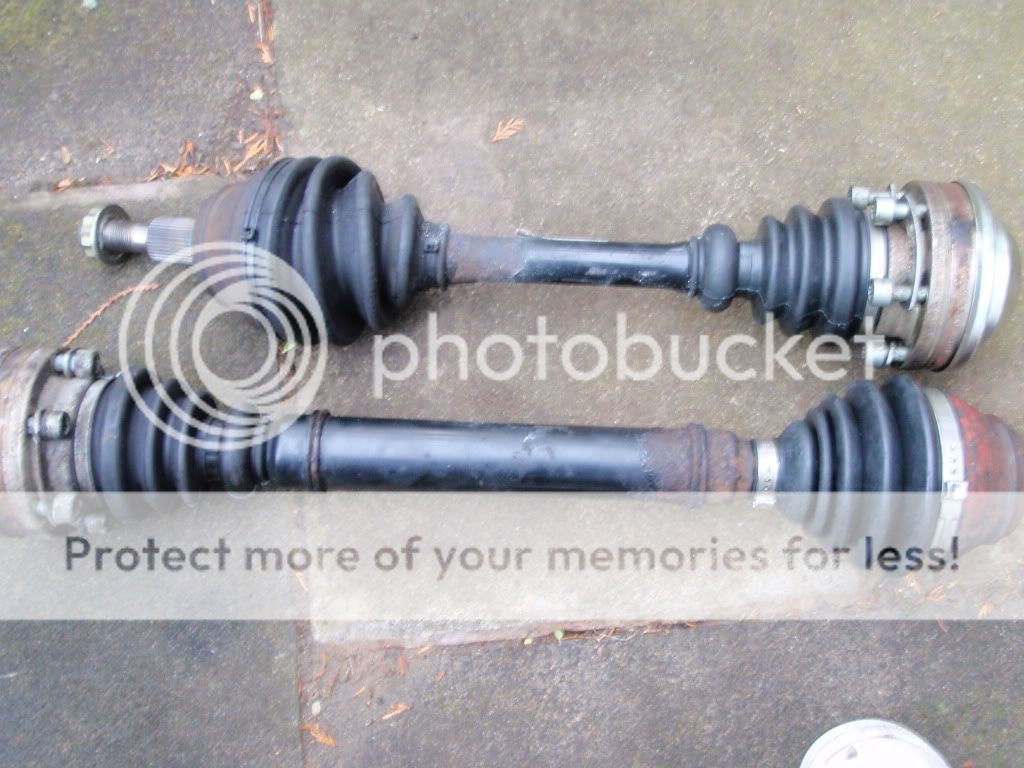
i initially took the car off the road to replace some much needed parts, 2 cv boots that were torn to buggery. and also as i was selling my standard wheels and had bought some new ones to refurb and paint, so its been on axle stands for a couple of weeks.
But upon inspection it became clear other areas would benefit from replacement parts and minor upgrades.
the parts i've got are as follows....

B5 RS4 wheels, pictured is an uncompleted primed one, they will be sprayed a light gunmetal called moonland pearl (vauxhall colour).
inner cv boot
outer cv boot
haldex oil and filter
bottom ball joints
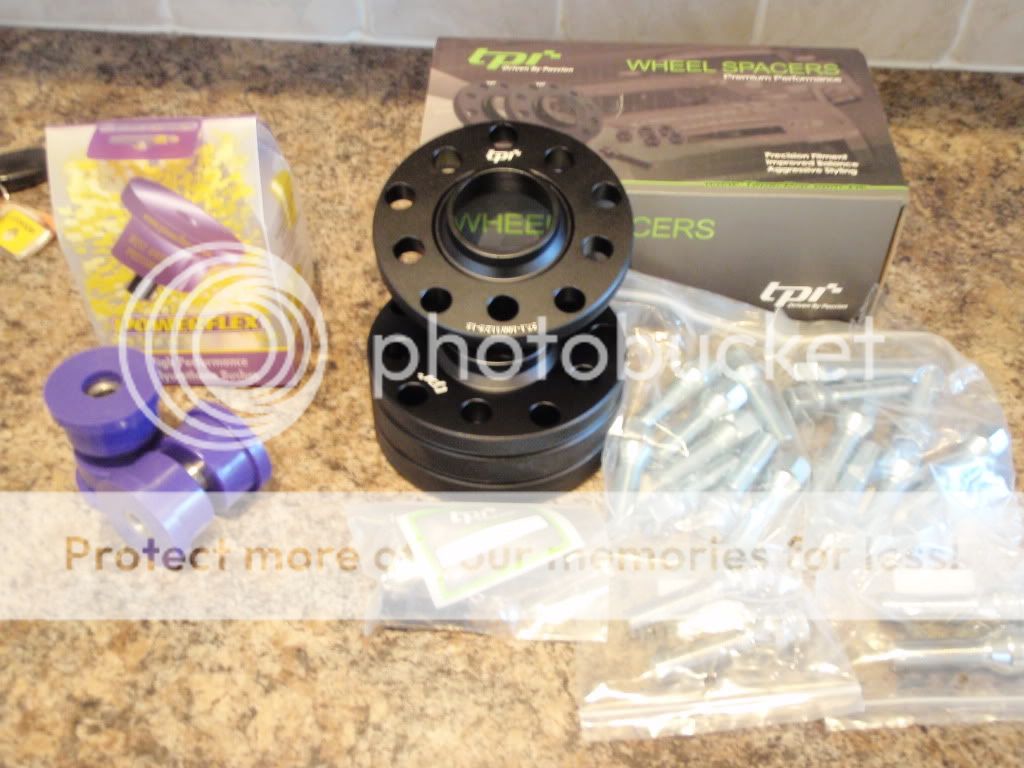
top mounts
powerflex dogbone bush (red diesel one)
thermostat
and what isnt pictured:
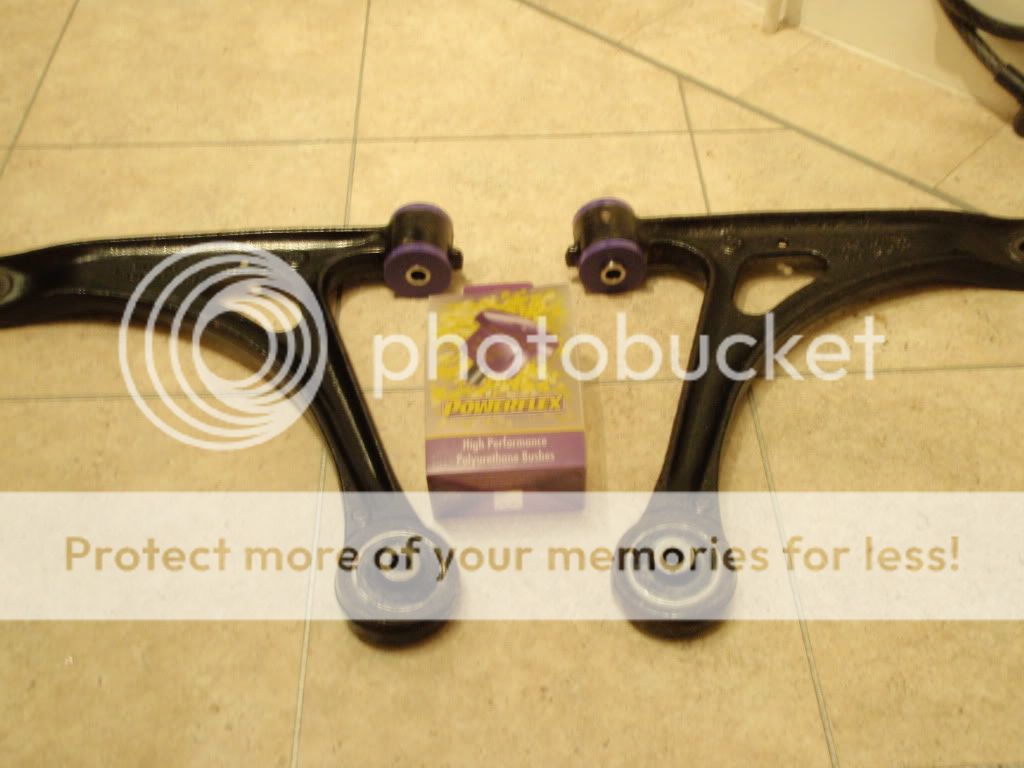
lemforder rear wishbone bushes
powerflex front wishbone bushes
tpi wheel spacer kit from theTTshop
egt sensor
il start by showing the condition of the parts on the car, that should show how worn they are, 10 years old, 133000 miles worth of frankly SH**E british roads....
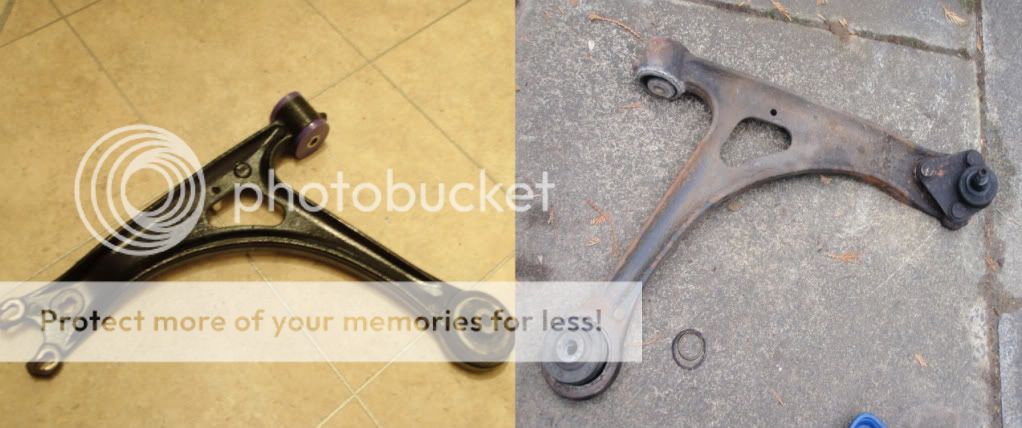
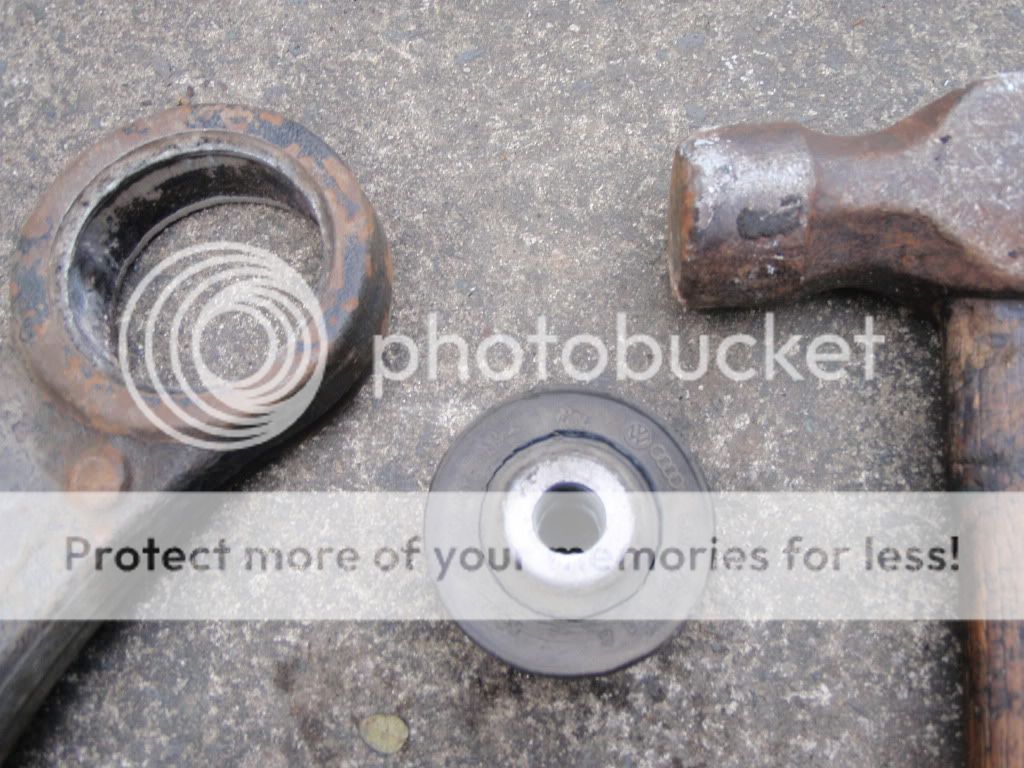
first is the rear wishbone bush on the drivers side, quite clearly split

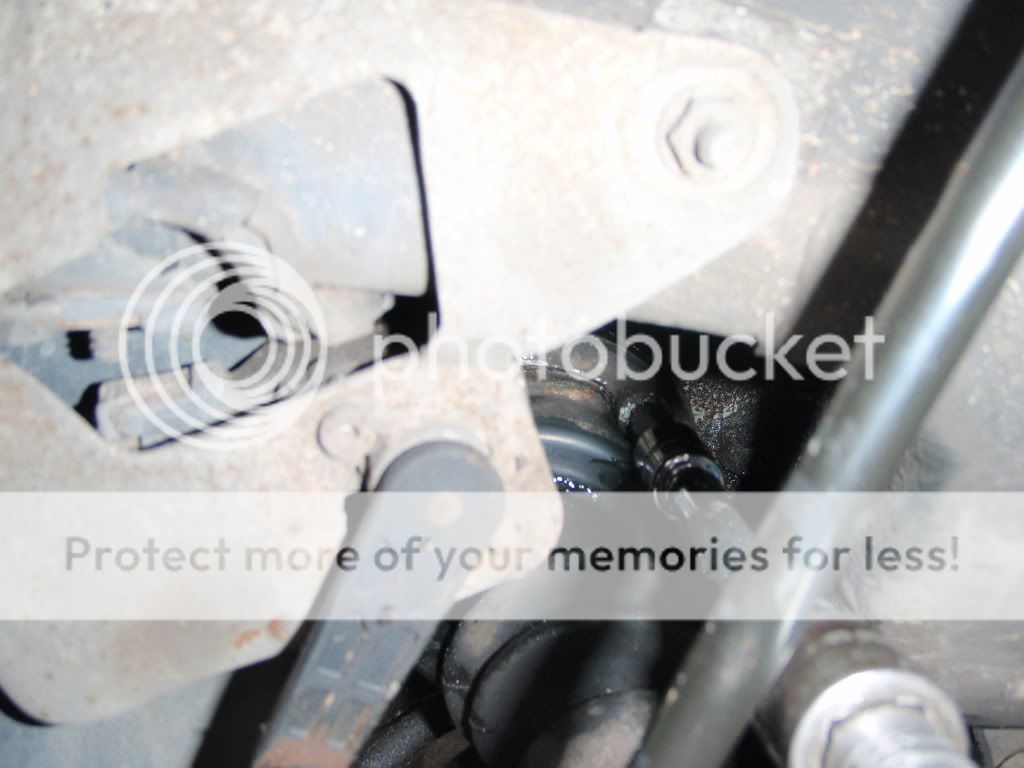
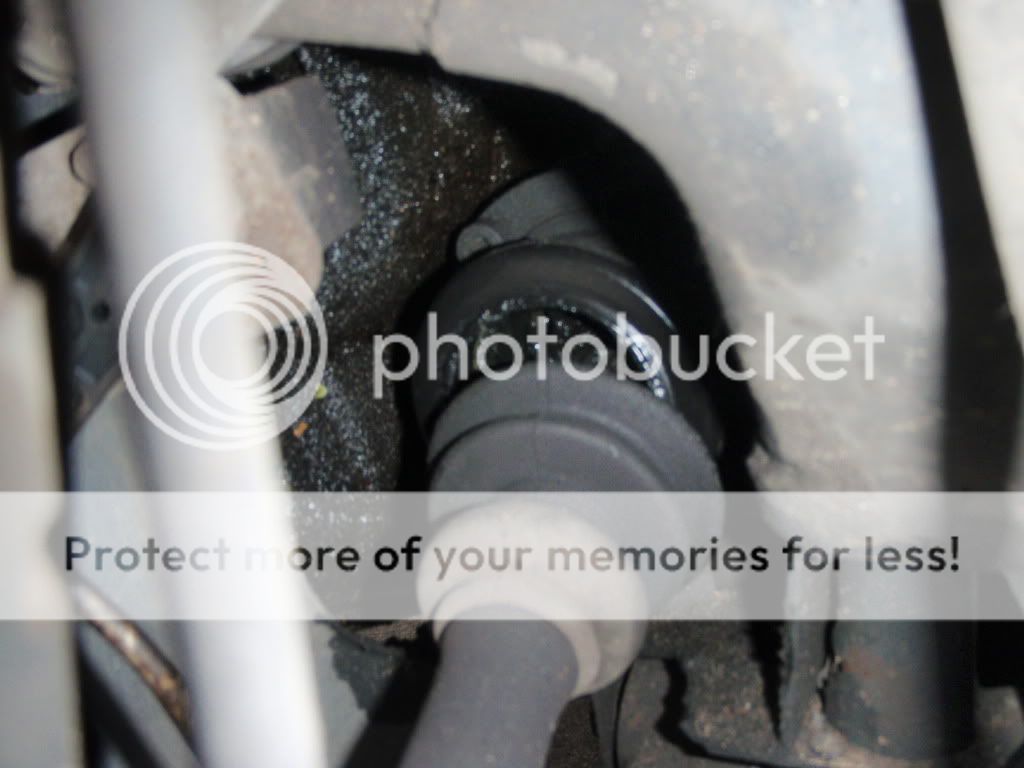
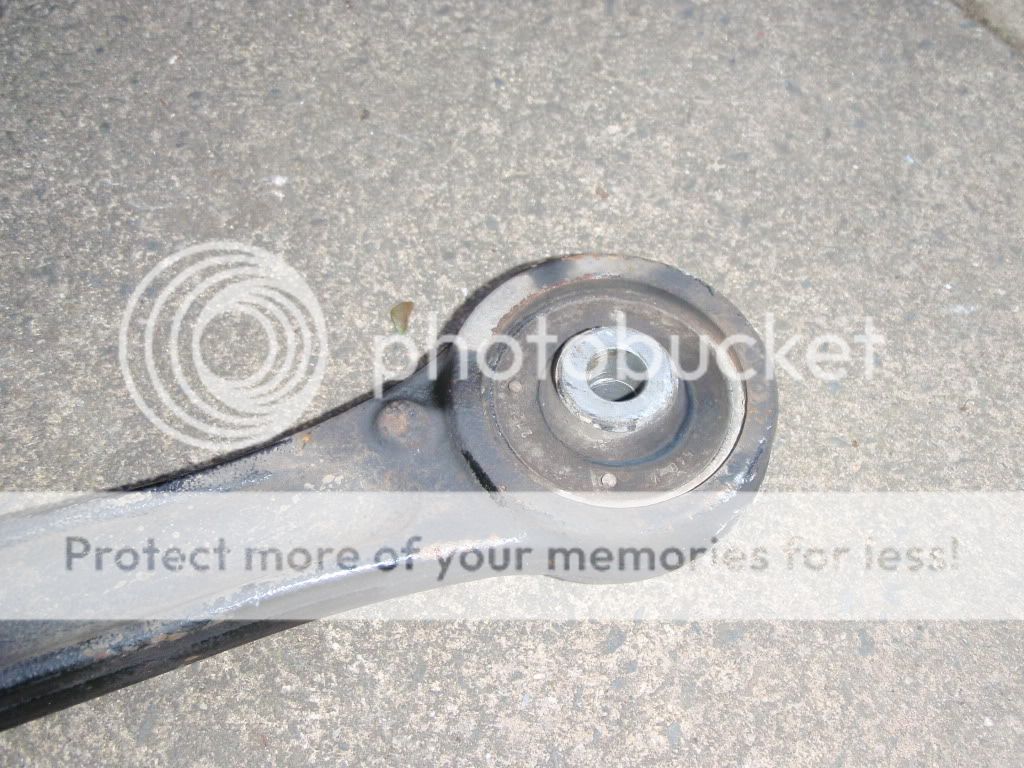
inner cv boot, pretty shagged to say the least
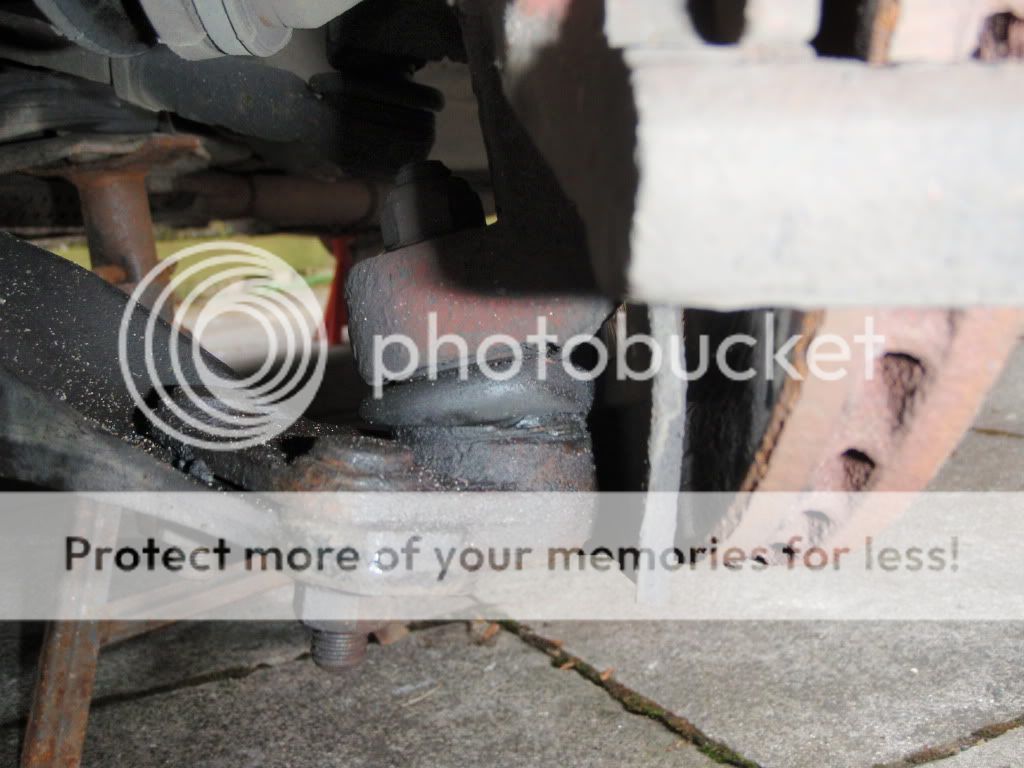
bottom ball joints, slight split at the bottom, going to be worn out anyway due to age/miles
so i started my work to take the wishbones out. drivers side, fairly easy, not to hard to crack all bolts out at all. 18mm bolt through the front bush, 18mm on the rear bush with nut on other side, held with a spanner and ratchet off. Three 16mm nuts on the underside of the ball joints.
ball joint nuts wer quickly sprayed with some primer for reference on refitting new ones so that alignment shouldnt be toooo bad to drive to get alignment done.

once all was undone and bolts were removed, i used a jack under the discs to raise it up, and with a pursuader (hammer) nocked the wishbone down off the balljoints, they then simply pulled out with relative ease.
this is the topside of the bush which was seen earlier, split, sitting ****** in the wishbone. it should be completely flush

underside shows just how bad they can be fromall this time and driving

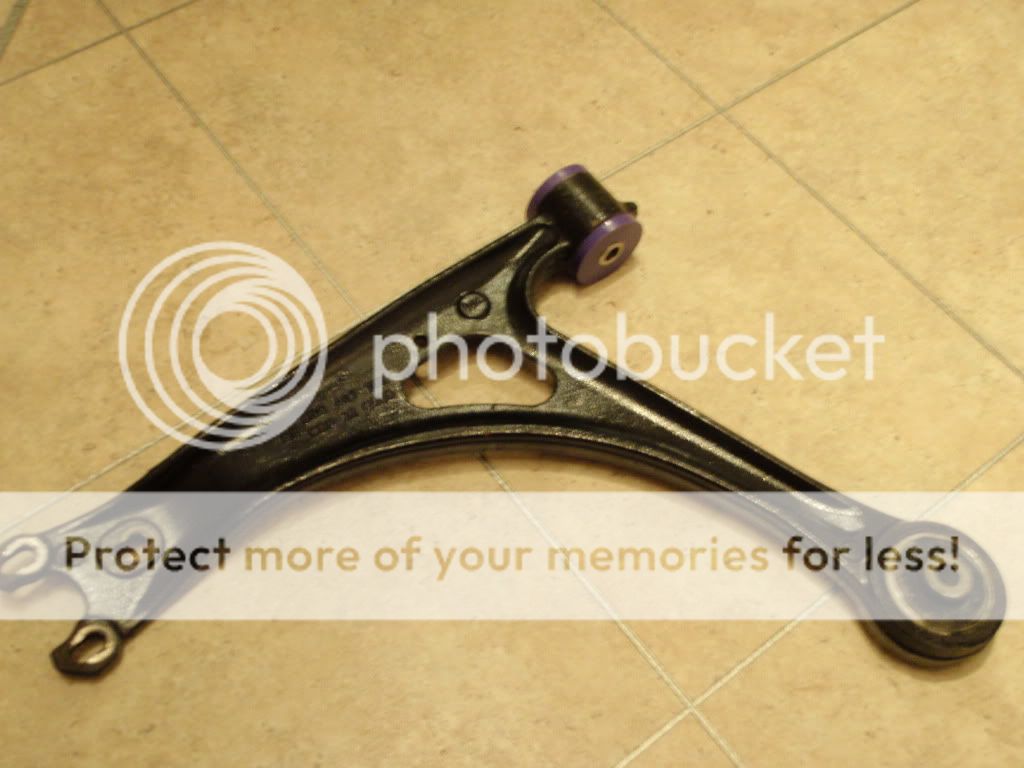
the front bush, later 45mm one (happy times), looks all mushed and all over the place really, a powerflex poly one should sort that out! i chose a poly one for this bush as it only has rotationally movement, so wont be all that hard on the ride, but the rear bush having multiple movement, im replacing with rubber so as not to jeapardise comfort.

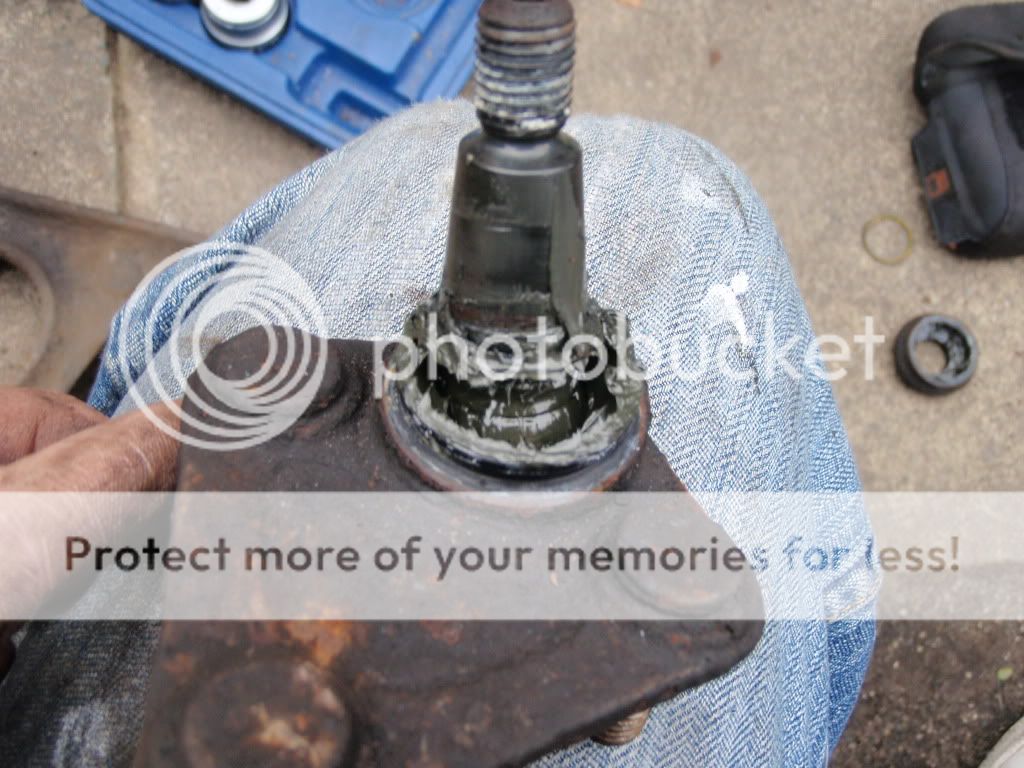
the ball joints were not as bad as i thought, no knocking movements, just a little loose most probably from lack of grease. i took one apart to see just how much grease was in there. the new ones are difficult to move by hand, whereas these can be moved with your little finger.

i decided to have a little go at the rear bush as it was ******** and thought it might drop out. 3 hits with the pursuader later and it came out. only leaving the metal casing thats supposed to be around the bush with it, oh well, shows how bad they are, and can be hit out later.
the passenger side was a different story, the rear bolt wasn't going anywhere, id tried so hard, im fairly strong and just couldnt get it to budge, then after a breather i said to a mate, im havin one last go at this ******, and pop, undone. i honestly nearly pooed myself!
this side seemed to have been replaced at some point, the arm was in much better condition than the other, and the bush had nearly no splits
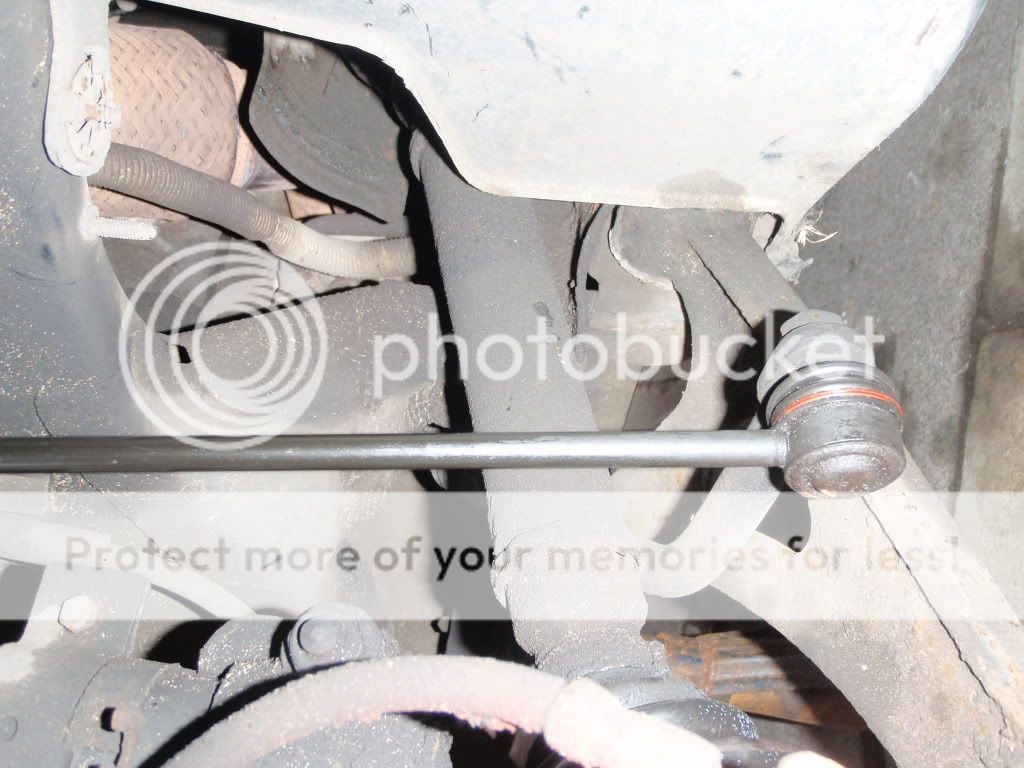
i also found out that very recently, well, before i bought the car last april, the droplinks must had been replaced, they look brand new, which is good.
so, wishbones removed, ready to have bushes pressed out and new pressed in at some point, this coming week most likely. they'l also be cleaned and painted up black just to look a bit prettier, just because im like that lol.
i still had plenty of light left so thought id tackle the dogbone mount. two bolts at the front of the mount, two at the back, and a bar going across the subframe undone at one end to oull it out, very quick, very easy.
bushes looked tired and were very soft, had left lots of rubber on the actual mount which was like chewed up gum.
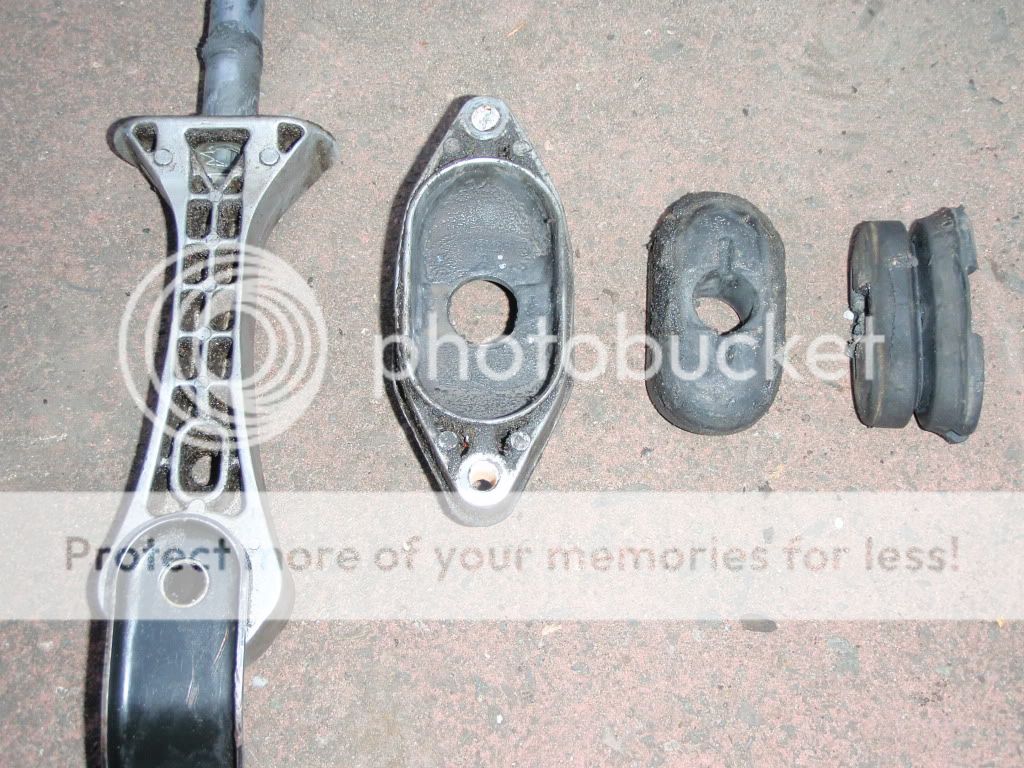
fitted the new red powerflex bushes and had a bit of a pain trying to get the bolt in by compressing it all but looks nice and pretty now, ready to rock and roll, or not in the engines case.

the rear bushes to go in

quite a productive day for myself.
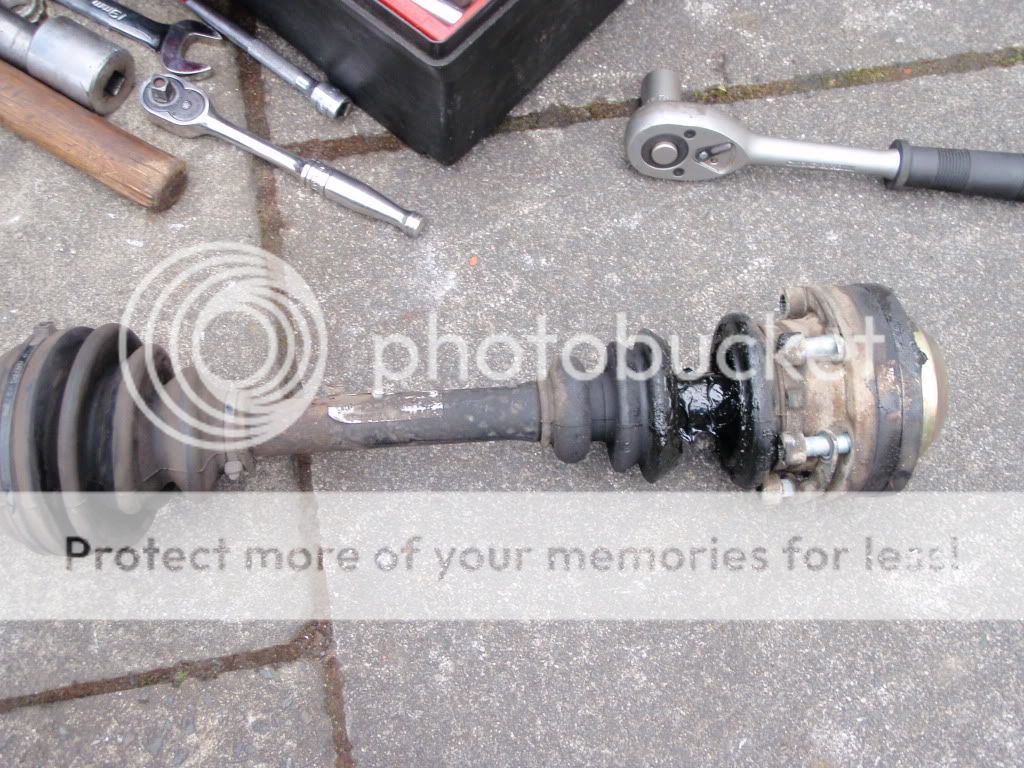
next job is to get the shafts out to change the cv boots and grease them up. take the shocks out to fit top mounts. and clean up wishbones and fit bushes and reassemble it all again.
all will be updated soon hopefully.
busy mountainbiking this weekend so will have try and fit some nights in and do bit by bit.
so so looking forward to having it on the road again, all nice and tight, with new wheels, and a few other detailed touches later on.
thanks for your time reading.
stay super
superkarl
one last thing, can anyone tell me how tight i should do up the dogbone mount??? seems to just wind in forever, dont want to overdo it. thanks
so, i took my car off the road before christmas with the intentions of doing a few things, however with the weather so terrible i did very little, until the past week or so.
i initially took the car off the road to replace some much needed parts, 2 cv boots that were torn to buggery. and also as i was selling my standard wheels and had bought some new ones to refurb and paint, so its been on axle stands for a couple of weeks.
But upon inspection it became clear other areas would benefit from replacement parts and minor upgrades.
the parts i've got are as follows....
B5 RS4 wheels, pictured is an uncompleted primed one, they will be sprayed a light gunmetal called moonland pearl (vauxhall colour).
inner cv boot
outer cv boot
haldex oil and filter
bottom ball joints
top mounts
powerflex dogbone bush (red diesel one)
thermostat
and what isnt pictured:
lemforder rear wishbone bushes
powerflex front wishbone bushes
tpi wheel spacer kit from theTTshop
egt sensor
il start by showing the condition of the parts on the car, that should show how worn they are, 10 years old, 133000 miles worth of frankly SH**E british roads....
first is the rear wishbone bush on the drivers side, quite clearly split
inner cv boot, pretty shagged to say the least
bottom ball joints, slight split at the bottom, going to be worn out anyway due to age/miles
so i started my work to take the wishbones out. drivers side, fairly easy, not to hard to crack all bolts out at all. 18mm bolt through the front bush, 18mm on the rear bush with nut on other side, held with a spanner and ratchet off. Three 16mm nuts on the underside of the ball joints.
ball joint nuts wer quickly sprayed with some primer for reference on refitting new ones so that alignment shouldnt be toooo bad to drive to get alignment done.
once all was undone and bolts were removed, i used a jack under the discs to raise it up, and with a pursuader (hammer) nocked the wishbone down off the balljoints, they then simply pulled out with relative ease.
this is the topside of the bush which was seen earlier, split, sitting ****** in the wishbone. it should be completely flush
underside shows just how bad they can be fromall this time and driving
the front bush, later 45mm one (happy times), looks all mushed and all over the place really, a powerflex poly one should sort that out! i chose a poly one for this bush as it only has rotationally movement, so wont be all that hard on the ride, but the rear bush having multiple movement, im replacing with rubber so as not to jeapardise comfort.
the ball joints were not as bad as i thought, no knocking movements, just a little loose most probably from lack of grease. i took one apart to see just how much grease was in there. the new ones are difficult to move by hand, whereas these can be moved with your little finger.
i decided to have a little go at the rear bush as it was ******** and thought it might drop out. 3 hits with the pursuader later and it came out. only leaving the metal casing thats supposed to be around the bush with it, oh well, shows how bad they are, and can be hit out later.
the passenger side was a different story, the rear bolt wasn't going anywhere, id tried so hard, im fairly strong and just couldnt get it to budge, then after a breather i said to a mate, im havin one last go at this ******, and pop, undone. i honestly nearly pooed myself!
this side seemed to have been replaced at some point, the arm was in much better condition than the other, and the bush had nearly no splits
i also found out that very recently, well, before i bought the car last april, the droplinks must had been replaced, they look brand new, which is good.
so, wishbones removed, ready to have bushes pressed out and new pressed in at some point, this coming week most likely. they'l also be cleaned and painted up black just to look a bit prettier, just because im like that lol.
i still had plenty of light left so thought id tackle the dogbone mount. two bolts at the front of the mount, two at the back, and a bar going across the subframe undone at one end to oull it out, very quick, very easy.
bushes looked tired and were very soft, had left lots of rubber on the actual mount which was like chewed up gum.
fitted the new red powerflex bushes and had a bit of a pain trying to get the bolt in by compressing it all but looks nice and pretty now, ready to rock and roll, or not in the engines case.
the rear bushes to go in
quite a productive day for myself.
next job is to get the shafts out to change the cv boots and grease them up. take the shocks out to fit top mounts. and clean up wishbones and fit bushes and reassemble it all again.
all will be updated soon hopefully.
busy mountainbiking this weekend so will have try and fit some nights in and do bit by bit.
so so looking forward to having it on the road again, all nice and tight, with new wheels, and a few other detailed touches later on.
thanks for your time reading.
stay super
superkarl
one last thing, can anyone tell me how tight i should do up the dogbone mount??? seems to just wind in forever, dont want to overdo it. thanks
Last edited: