Prawn and BigAls A3 Track Car

Oh ****. That's. I good then. I've not got any more.

Will crack on for now and get something sorted ASAP. Cheers Paul

And just noticed... heat wrap/shield the heater coolant hoses too...

Essentially anything that is reasonably close to the exhaust manifold will most likely melt/deteriorate unless wrapped...

<tuffty/>
 
Thanks Paul, ****** thing, it's never ending!

Had another good day today.

Started off by going to B&Q and buying some cheap spanners to butcher to get the manifold on, I attempted to bend a 12mm spanner, but it just snapped! I tried welding it, but the welder didn't want to know, so I had to resort to this:

cb3ef962.jpg


What a monster is it too! All but two of the studs are easy on the XS manifold. After many patient hours, it's all bolted up, and all 13 bolts are 100% tight, with nordlock washers. I'm confident it's not going anywhere!

After that, I moved onto the turbo, which was surprisingly easy to my delight! All it needed was one cut down spanner to allow the swing at the back of the bulkhead.

So, after several day buggering about, it's on!

0855c00b.jpg


Iphone4 came in incredibly handy for checking of the crush washer was in place properly on the oil line:

c787a224.jpg


I also offered the downpipe up as a trial, and it appears to fit pretty well!

adafec10.jpg


Didnt' get any more pics, I spent the rest of the day botling up all the oil/coolant lines, so the turbo is now finally in place, bolted up, and not going anywhere.

AFter that I whipped off the inlet manifold, and started stripping down my utterly bodged cooling system, I'm going to have a whole load of fun sorting that oiut tomorrow!
 
Nicer spanner dude, you should patent that as a manifold spanner and start banging them ou on the bay ;)

I'm guessing that if the head was to come off you could bolt on the mani before lowering the head back on?
 
I think so yea, although, to be honest, I'm not sure it'd be that much easier! the issue wasn't with space or movement, but with getting a tool small enough that you could turn it at least 1/6th of a turn to move into to the next flat if you see what I'm saying.

A bent spanner would work a treat, but also, due to the angle of the runner next to it, you need to thin down the head the the spanner a fair bit to get it in to the tiny gap. a full headed fat spanner wouldn't go in and allow enough of a turn, even if it were bent.

Still, I was told it couldn't be done properly with the head on, and it's done, every single bolt is dead tight, and I'm confident it's been done properly, so I'm happy!

Having seen the results of Bills ko3-2283 lupo, I just can't wait to get it mapped!
 
Can't ****** wait Dave! For the while, it'll run on my standard MAF and injectors at acutator pressure only, just to put a few heat cycles through everything and ensure it's all good before I finally book myself into Bills for mapping. Considering how long it's taking, and how Busy Bill is these days, who knows how long that'll be!

First booked trackday is March 17th at Rockingham though, so I want to try and complete before then!
 
The runners exit the ports at a very sharP angle, and almost immediately cross above the studs.

It's so tight, that of yOu pushed the manifold home in the studs first, it's be impossible to get some of the nuts on. Two Of the nuts have to be tightened down with the mani pulled hard off the head, or the nuts themselves catch the runners! It's that tight!
 
Any ideas what tuners and manufacturers of these parts do? Surely there must be an easier way of doing this?!

Bill has a selection of 'modded' 12mm spanners for using on 20v exhaust manifolds... :)

<tuffty/>
 
Witj regards to rods, your plan is too run this set up at low boost (16psi iirc) controlled with an EBC to cap spikes and make boost and torque delivery smooth and gradual with peak power and torque being quite high (as you will be hooning it at high rpm) in an attempt to look after your rods. Am i right? I do try and pay attention lol.

Also what will your rev limit be? As you havent touched the head have you.

Great work BTW. It also answers that question that pops up everynow and agin of 'can i fit/remove the turbo with the head on'. It's first ive seen of it. Your bay does look alot less cluttered at the back than any ive seen tho.
 
Much less room with the XS one I believe Dave, but I do have te advantage of no big transfer box behind the engine, that has to help with access.

As for boost/rods, Karl is bang on. Initial plan is to run ~16psi on this engine controlled with an ebc.

Something like bills midway setting on the lupo would be perfect:
http://www.audi-sport.net/vb/a3-s3-forum-8l-chassis/144648-got-k03-s-installed-want-more-bhp.html

280bhp at around 7k rpm, but a very engine friendly 230ish lbft held well across the rev range.

Considering its previously run at 24-25psi and 290lbft for a very long time, I'm thinking it should be ok.

Either way, as soon as its in and running I'll be looking for a new bottom end to build with rods :)
 
Great work BTW. It also answers that question that pops up everynow and agin of 'can i fit/remove the turbo with the head on'. It's first ive seen of it. Your bay does look alot less cluttered at the back than any ive seen tho.

FWD/K03 based engine bays are a lot easier to work on than AWD/K04 based ones... not having a bevel box is a god send... not worked on an LCR yet though turbo wise so would imagine them to be a bit easier than an S3...

Removing a K03 setup is much easier than removing a K04 setup and fitting a K04 3" downpipe is way way easier than doing anything with the OEM K04 downpipe...

Not to take anything away from Nicks sterling work of course... just want to put it into perspective :)

<tuffty/>
 
getting the single 3'' DP into place without the bevel box was hard enough, so I can only imagine trying to remove the S3's twin downpipe from an S3 bay with the bevel box in must be an absolute nightmare!

Just want to crack on with it now, but I'm waiting on parts arriving in the post! argh.

Could be a few weeks before this one gets fired up the way it's looking :(
 
Have you booked all this week off work to do this project mate?

I know you're excited but the worse thing you can do is rush it. Take your time and it'll be well worth the wait.

ps. shotgun a couple of pasenger laps if we ever get round to doing Brands Hatch :friends:
 
Just want to crack on with it now, but I'm waiting on parts arriving in the post! argh.

Could be a few weeks before this one gets fired up the way it's looking :(

I'm in the same boat mate. Waiting on manifold flanges to arrive from JBS then i can crack on making the manifold. Though mine is looking like it's going to be a fair bit longer than a few weeks before it's done.

Cracking progress though, looking forward to seeing some track vids when she is done :salute:
 
Have you booked all this week off work to do this project mate?

I know you're excited but the worse thing you can do is rush it. Take your time and it'll be well worth the wait.

No danger of me rushing this one matey, 2 days just to fit a turbo and manifold isn't speedy :p

I don't want to rush anything, I just want to do something! I've stalled today, as I'm waiting on parts to arrive, and there really isn't anything I can do until I've got stuff back. I've had all last week off work, and I go back thursday, so I've got today and tomorrow to get some progress, then I'm back to weekends only.

Can't wait to get it done though, but I'll take my time and make it right

Winner! UPS just turned up with some new heater hoses and fittings, so I can get some more done :)
 
I used good old halfords satin black for the manifold, I've used it on loads of engine parts before and it's always been great, so long as they're not SUPER hot things.

For the rocker cover, I started out with some VHT hemi orange, but it turned out a ****ty brown colour:

fa162a06.jpg


So I was browsing halfords and came across this orange enamel spray, and it seems great! Should be fine with the heat too.

I love how it looks, can't wait to get it all back together now!

Wellycooler has also been ordered :) Thanks for your help this morning Westy
 
I love that orange!!
I mite take that colour on myself.
Keep up the good work & I'm looking forward to the out come!

This is going to be sweet

Pat
 
Cheers Pat, I'm really looking forward to firing it up for the first time on the new turbo, it'll be a tense moment!
 
Had a fairly good day today, I started off by sorting out a **** up I made yesterday:

Somehow, I managed to drop a tiny clip when working near the header tank the turbo water line. Sodds law dictated that it had to fall down inside the cambelt cover, so this morning I had to remove the aux belt lower pulley, remove the cambelt cover, and find the dropped part!

Found it hiding tightly in between the cambelt and the bottom pulley, on the back side, ready to get dragged into the pulley and cause chaos on first start up!

The evil clip:

67d07017.jpg


Ran my inlet manifold and rocker cover through the dishwasher yesterday, and they came out great!

97e70560.jpg


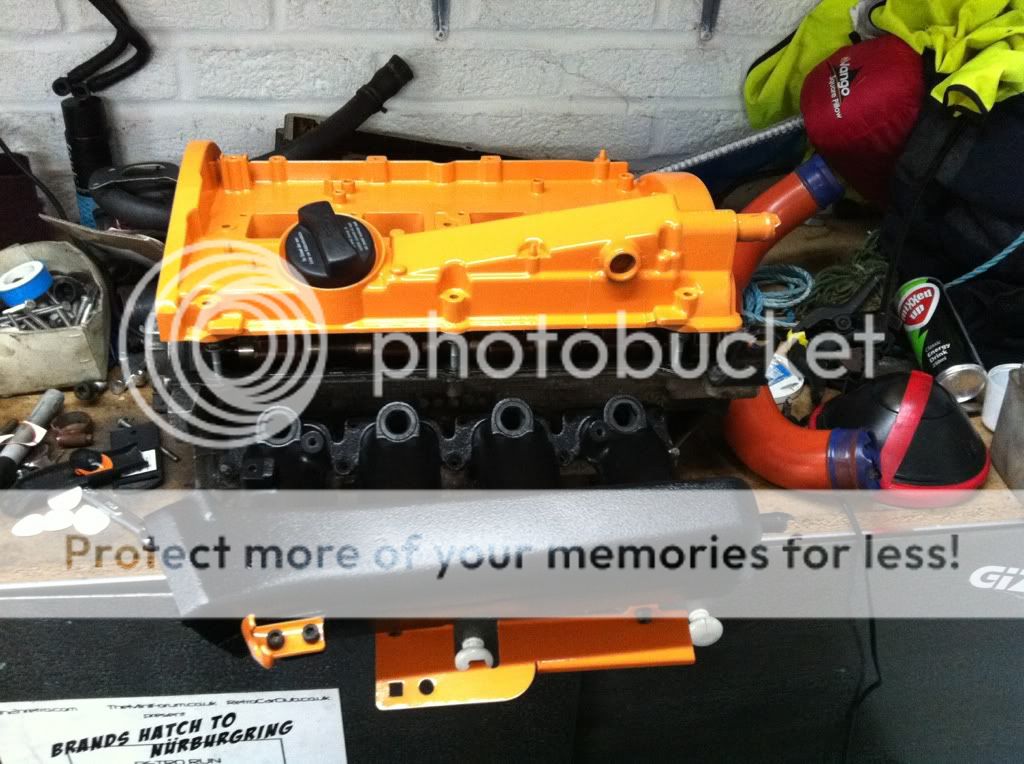
Threw a coat of the VHT orange onto the rocker cover, and as expected, it's awful.

fa162a06.jpg


Still waiting on parts this morning, I decided to spend a while cleaning up the incredibly oily head:

cacf41a3.jpg


Pretty happy with how it's come up really, considering there was over 200k's worth of oil leaks baked onto it

b7e4c1ce.jpg


Nipped into town to take Tori to work, and popped into Audi - picked up a new inlet manifold gasket, and got the workshop tech to look up diff bolt torque settings for me, very helpful..
Also stopped off at the nut and bolt shop and got some new stainless allen bolts for the inlet manifold, several of mine rounded off when I removed it.

Picked up some new orange enamel in Halfords on the way home, and gave the rocker cover a flash over in the better colour, as well as a can of satin black for the inlet manifold:

0d707e65.jpg

(excuse the report, but this keeps things in order!)

Very happy with how that looks now.

Last thing of the day, I went to the post office to collect my 2 parcels I missed whilst I was out, a Sealey timing chain tensioner tool (thanks for the heads up Tufty!) and a new metal water pipe to replace my rusted out old one

Tried out the tensioner tool on my spare head, so now I know how to do that on mine. Simple bit of kit but very useful!

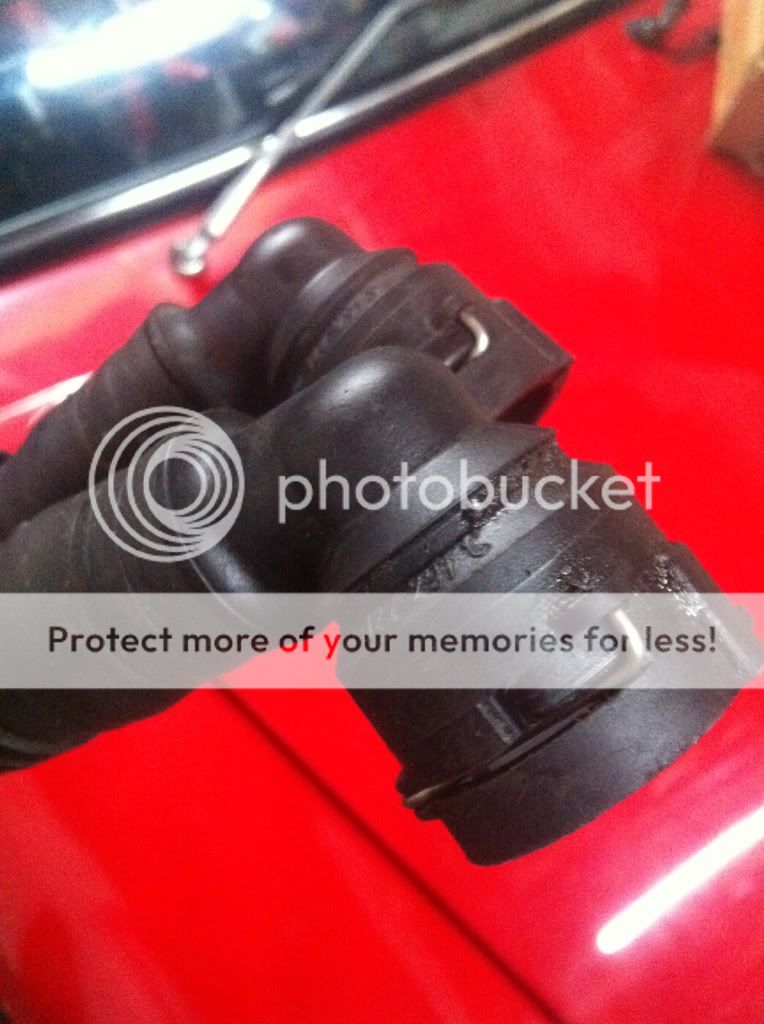
I've now got everything I need to finish the cooling system, apart from the little push fit hose joiners to join to the bulkhead.

The A3 ones are right angled like this:

a8319168.jpg


I need the S3 ones which are straight, to go on the end of these:

f08c86de.jpg


Anyone got one to hand so I can steal a part number? or have a copy of Etka to look it up for me? I need to order some from TPS tomorrow so I can fit it all on Saturday!

Progress is being made, feels like I'm past half way now!
 
it's a little tool that goes onto the tensioner and pulled the two sides together so slackening the chain, it gives just enough slack to unbolt the tensioner and move it around to change the gasket and half moon seal which leak so often!

Very handy, only cost £12, but brilliant.
 
it's a little tool that goes onto the tensioner and pulled the two sides together so slackening the chain, it gives just enough slack to unbolt the tensioner and move it around to change the gasket and half moon seal which leak so often!

Very handy, only cost £12, but brilliant.

I'll get me one of those. Where did you buy it from?
 
looks like part number 35 to me mate, although that picture shows right angle connectors like my a3 ones.

For reference, the A3 part number is 1J0 122 291 C, I'm looking for the straight S3 version whatever part number that is!

It's where the two heater lines connect onto the heater matrix pipes at the bulkhead. Cheers for looking it up dude, if you get any joy with a part number let me knwo!

Why didn't you say so! I know the heater matrix very well :banghead:

Let me get you a part number

Edit:

Is this what you need:

d88187f7.jpg
 
I found it dude but I have a bad feeling you only get them when you buy a Heater matrix! I'm going back through my thread to try and jog my memory, I might have 2 knocking about in my garage if that's the case:

HeaterMatrix.jpg
 
I just checked through my text conversation with Jason and he said that the quick coupling connectors come with the heater matrix. Now for some reason I dont remember 2 new ones coming with the new matrix I bought but I'll look for them in the garage. I'll let you know tomorrow morning mate.
 
Thank's man! You're a winner!

Strange that they only come with the matrix, especially when the piece I need is 'engine side' of the coupling. Two of those are the last bits I need to plug in my cooling system!

If you can't find any I'll have to have a trawl through the breakers and see if someone fancies sending me them :p

Thanks again :)
 

Similar threads

Replies
26
Views
8K
Replies
6
Views
4K
Replies
10
Views
4K
Replies
166
Views
20K
Replies
40
Views
4K